
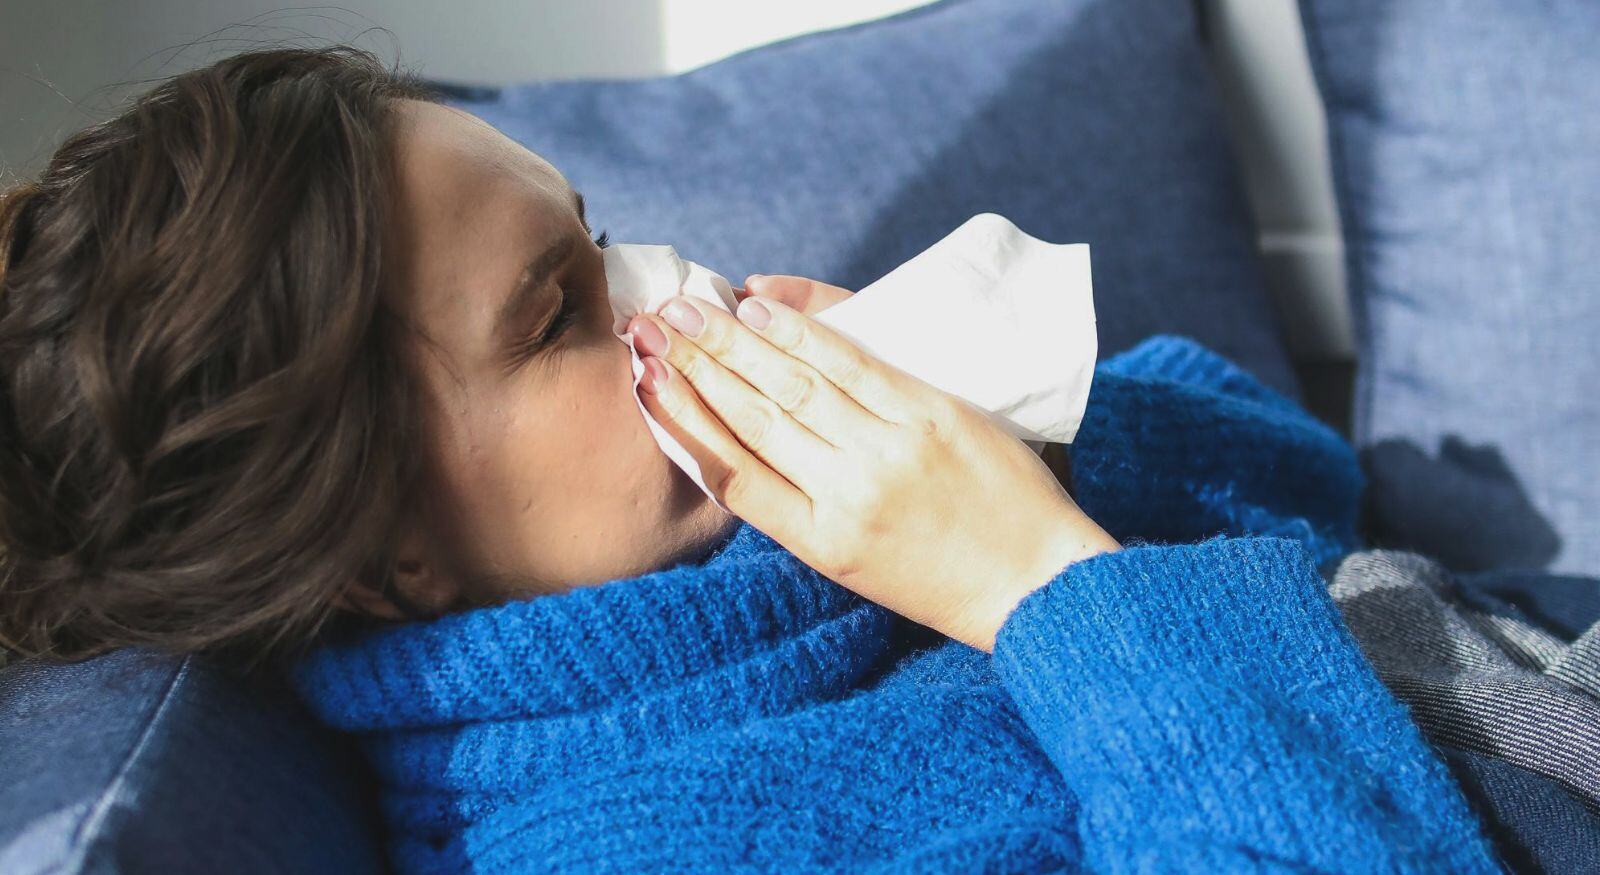
It all starts when you catch a whiff and sense something isn't right. As you explore more, you realize there is a musty smell, yet you can't pinpoint the source. These last few days have been raining cats and dogs outside, yet after looking up and down, you find no signs of mold in your house. Maybe it's just your imagination, or perhaps the smell comes from underneath…
Once you finally muster up the courage to look down there, you discover the culprit: some rainwater turned your dusty crawlspace into a haven for mold. The mold remediation and other possible repairs will not come cheap, and most insurance policies do not cover crawl space encapsulation expenses. However, you should discuss your coverage with your insurer. Should your policy state coverage, Restore-It will work with your insurance company on your behalf.
This nightmarish scenario is a lot more common than you might think (especially the part where people forget to look at their crawl space!). However, if you take action before disaster strikes, you can avoid it altogether. Heck, you can even improve your overall indoor air quality and reduce your energy bills in the process! But, "How is that possible?" you ask.
Enter crawl space encapsulation.
With this solution, you can seal off your crawl space from the outside while controlling its humidity levels for years to come! This will benefit your home in more ways than preventing mold.
Over a decade of experience serving our neighbors in South Arkansas makes Restore-It the go-to place for professional crawl space encapsulation. In this guide, we will walk you through everything you need to know about this fascinating process, so whether you are in El Dorado or Camden, grab a seat and tag along!
▼Check out our FREE downloadable guide below!▼
You can download a PDF version of this guide to check whenever you want to—and the best part? It's completely FREE! Just fill out the form below to download a printable copy!

Table of Contents
Click on any chapter to scroll directly to it!


Learn everything about crawl space encapsulation. Discover its benefits (including how it can save you some bucks on your energy bill) and common problems with unsealed spaces. We clarify misconceptions, answer your questions, explain Restore-It's process, and more! Dive in with us and get everything you need to know about encapsulation.

First of all, what exactly is a crawl space? To understand what it is, you need to look at your home, or rather, below your home. This area is located just underneath the first floor of a home and is called a "crawl" space because it's not tall enough to stand up in ―you'd have to crawl to move around in it. Unlike basements, crawl spaces are short and often have dirt floors.
Their primary function is to provide a buffer between your house and the earth. They often house the plumbing, wiring, and ductwork and have vents to let the air circulate. However, here in humid South Arkansas, this doesn't work as planned and can actually make things worse. A lot worse.
Common Problems in Unsealed Crawl Spaces
Maintaining an unsealed crawl space is like a ticking time bomb: it can lead to several issues down the line, and the longer you wait, the worse it gets. Let's take a look at them so you can prevent future headaches:
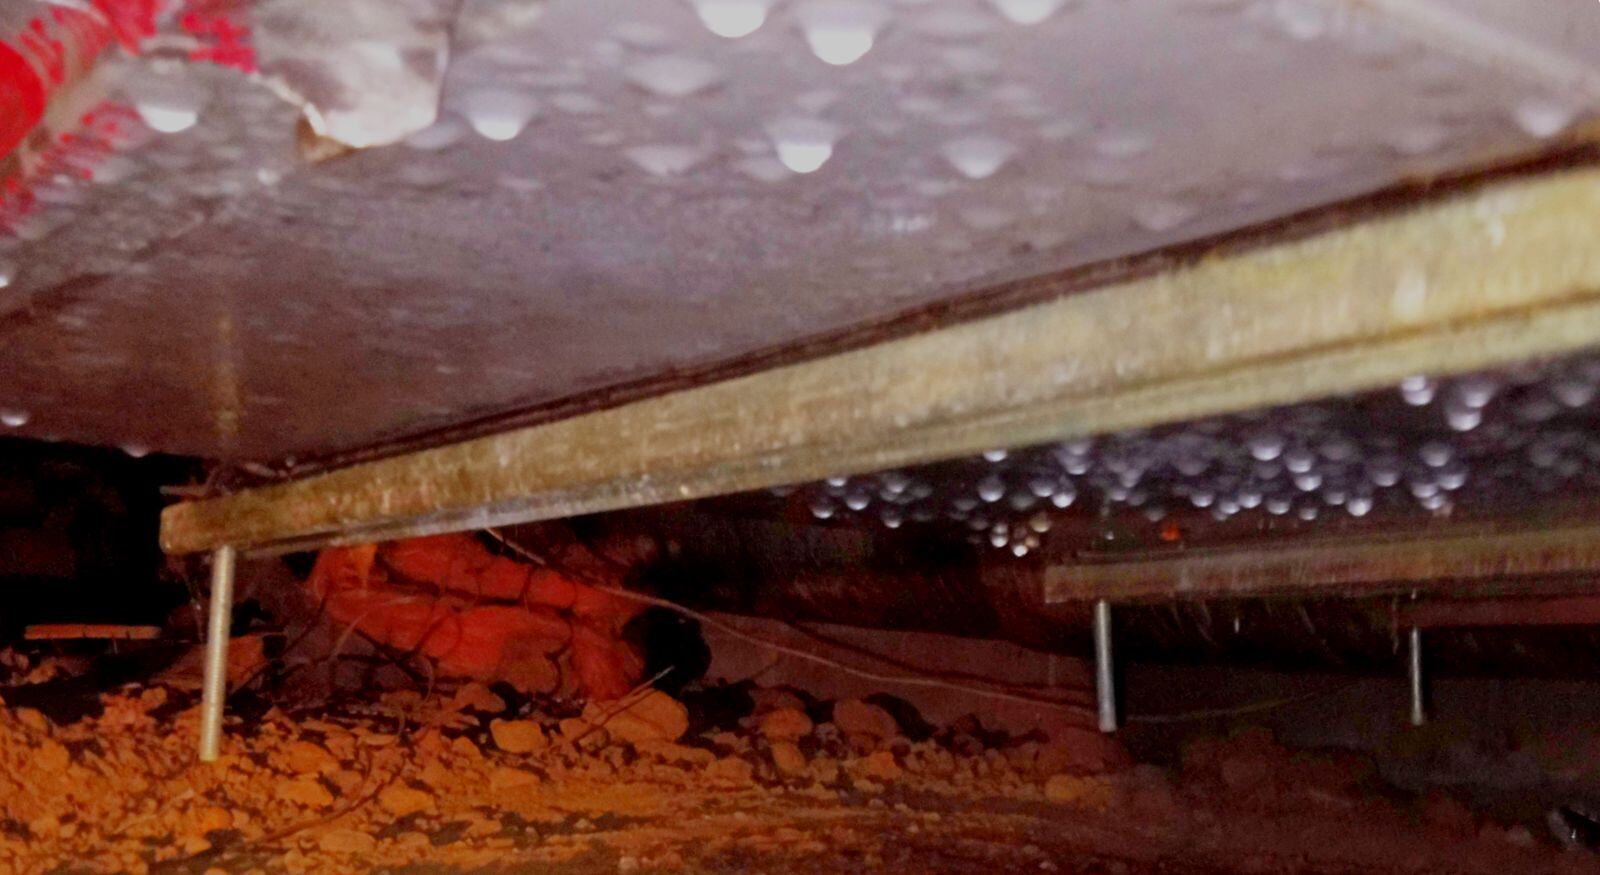
1. Moisture Intrusion: There are many ways in which water can get into your crawlspace: from the high humidity in our Arkansas air, to rainfall and poor drainage, to leaky pipes. With enough time, this moisture can cause all sorts of problems in your home.
2. Mold Growth: The United States Environmental Protection Agency (EPA) reminds us that mold spores are everywhere, and where there is moisture (and organic materials like wooden floors), mold growth is likely to follow. This leads to musty odors, health problems, and damage to the home's foundations.

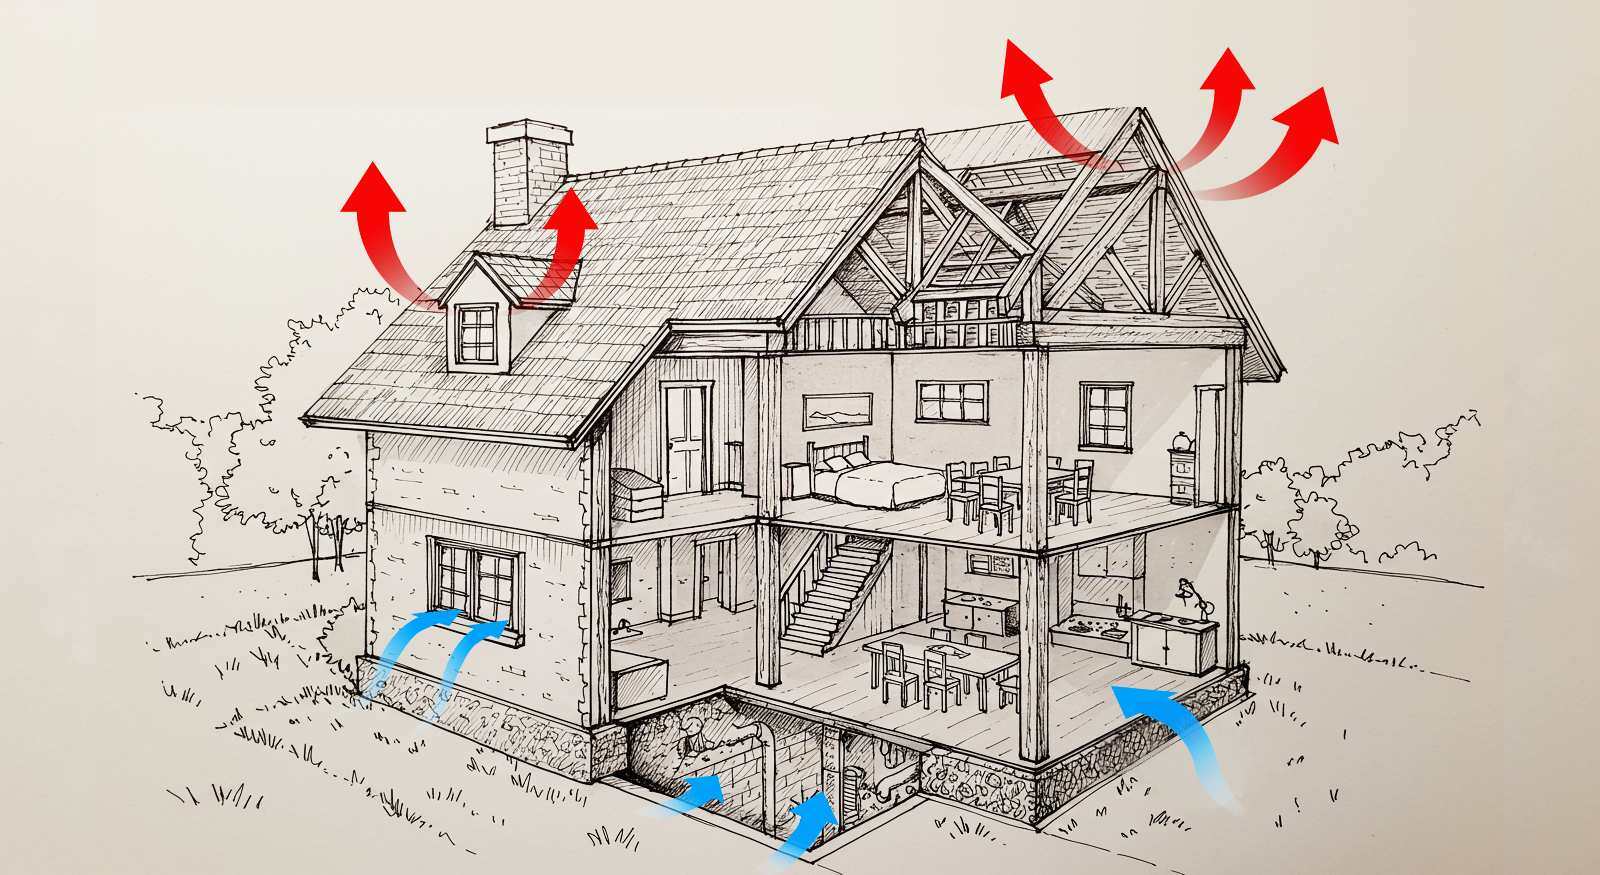
4. Worse Air Quality: Due to the "Stack Effect", most of the air you breathe inside your home comes from the crawl space. According to this phenomenon, warm air rises and escapes through the upper parts of a building, creating a vacuum that draws cooler air in from lower levels. If your crawl space is unsealed, air from below can carry mold spores, dust mite droppings, or pest waste particles indoors. This, in turn, can cause health issues ranging from allergy symptoms to more severe problems for people with asthma or those who are immunocompromised.

5. Structural Damage: Mold needs three things to grow: air, water (moisture), and organic materials. This is why, given enough time, the wooden beams and joists supporting your floor can start to rot and weaken. The same can happen to the foundation of the home itself, leading to very expensive repairs in the future.
6. Energy Loss: Remember what we said about the "Stack Effect"? As warm air rises and escapes upwards, it pulls cooler air from below. During winter, this forces your heating system to work harder. Meanwhile, your air conditioner has to keep up with the humid air during summer. This means higher energy consumption and bigger electricity bills at the end of the month.
7. Efflorescence: Sometimes confused with mold, efflorescence presents as white, powdery stains on concrete or masonry walls. This phenomenon occurs when water moves through the foundation walls and evaporates, leaving mineral salts behind. It's a minor, cosmetic issue (especially compared to the other issues mentioned above), but it's also a sign of moisture problems.
Leaving your crawlspace unsealed can hurt your home, the health of its occupants, and even your wallet! By now, you must be wondering, "OK, so what can I actually DO about it?" Thankfully, there is a solution to this problem, and it's called professional crawl space encapsulation. In this guide, we are going to discuss:
- A definition of crawl space encapsulation and the steps involved.
- The benefits of crawl space encapsulation.
- Our process, including the timeline and how to prepare for it.
- Considerations regarding cost, billing, and the return on investment
- How to pick the right company for encapsulation

If an unsealed crawl space is a problem, what's the solution? The answer is encapsulation. Let's examine this process in more detail.
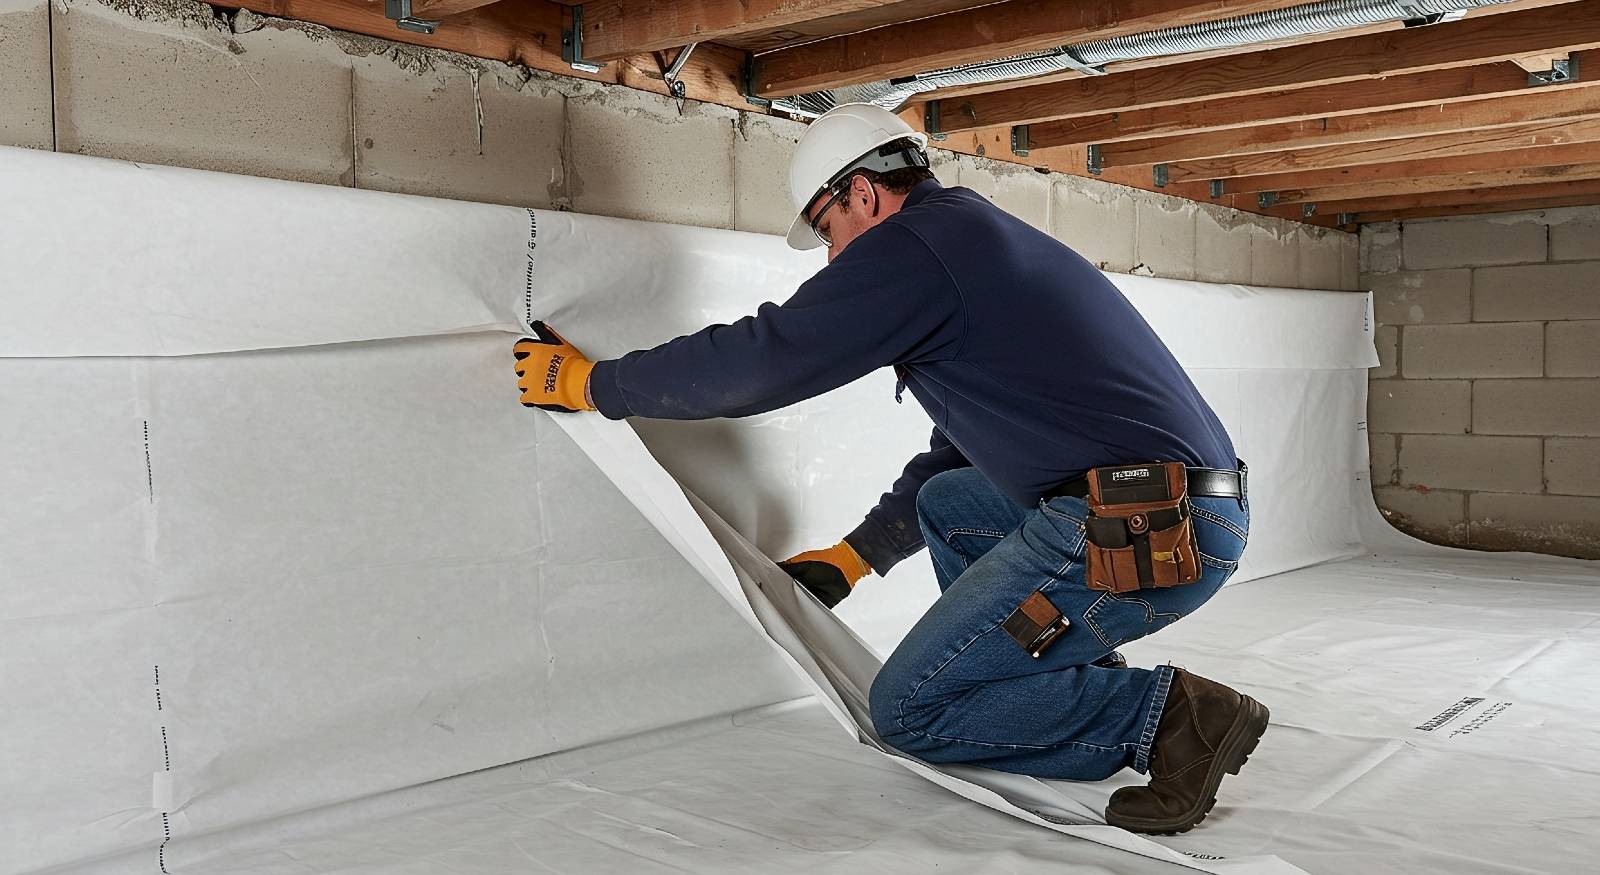
Crawl space encapsulation involves separating the area under your home from both the outside air and the ground. This is achieved by closing off vents, sealing air leaks, and covering the floor and some building materials with a durable vapor barrier. A dehumidifier is also placed there to further control humidity levels.
By fully sealing the crawl space, you can make the area inhabitable for insects, rodents, and other pests. On the other hand, closing off all air entries prevents damp air from getting in, while lining the floor can prevent humidity from the ground from seeping in. If you add a dehumidifier to the area, you make it dry enough to avoid mold growth. This also affects your indoor air quality and temperature, preventing extra health costs and saving on your energy bill.
Debunking Common Myths on Encapsulation
Now, crawl space encapsulation is no walk in the park. It's a home improvement project that requires significant effort and investments, so it's natural to encounter various opinions. Sadly, not all of those opinions are well-informed or accurate. Let's clear the air and debunk some common misconceptions.
Myth 1: Encapsulation Worsens Indoor Air Quality.
Fact: The opposite is true. Many homes, especially in South Arkansas, have vented crawl spaces that can allow cold, humid, and potentially contaminated air into the living areas due to the "stack effect." When done correctly, professional crawl space encapsulation seals these entry points and controls humidity with a dehumidifier, actually improving indoor air quality by creating a healthier living environment.
Myth 2: You Only Need Encapsulation If Your Home is Old.
Fact: While older homes often benefit significantly, new homeowners shouldn't dismiss encapsulation. Investing in encapsulation for a newer home is a proactive measure that protects against future moisture problems and pest infestations. It also adds value to the property and enhances energy efficiency and indoor air quality.
Myth 3: Encapsulation Produces High Levels of Radon.
Fact: Radon is a naturally occurring radioactive gas that can seep into homes from the soil. Some worry that sealing the crawl space will trap radon. However, a professionally installed encapsulation system seals the exterior to prevent outdoor air (and soil gases) from entering. If radon is a specific concern, testing and, if necessary, a separate radon mitigation system are recommended.
Myth 4: Encapsulation is Too Expensive and Not Worth It.
Fact: While encapsulation is an investment (typically around $7 - $12 per square foot, potentially more with add-ons), its many benefits offset the bill.
Myth 5: Once Encapsulated, You Can Forget About It.
Fact: Encapsulation reduces maintenance, but it's not entirely "set it and forget it". Regular inspections (e.g., biannually, coinciding with dehumidifier filter changes) ensure the system remains intact and effective.
Myth 6: Encapsulation Only Works For Damp Crawl Spaces.
Fact: While moisture control is a primary benefit, all homes can benefit from encapsulation, regardless of the current dampness level in their crawl space. Beyond reducing moisture, it helps prevent pest infestations, improves indoor air quality, enhances energy efficiency, and adds property value.
Myth 7: Encapsulation Takes Care of All Pest Control.
Fact: Encapsulation makes your crawl space less hospitable to pests like spiders and rodents by sealing entry points. However, regular home inspections and active pest control measures may still be needed for overall pest management.
Myth 8: Some Crawl Spaces Are Too Small to Encapsulate.
Fact: Even very small crawl spaces can often be encapsulated and benefit from it. While it might be a tighter job for professionals, it's usually feasible. Sometimes, minor excavation is needed to accommodate equipment like a dehumidifier. It's best to get a professional assessment rather than assuming it's impossible.
Myth 9: Encapsulation is Just a Home Improvement Fad.
Fact: Crawl space encapsulation is a proven solution that is gaining traction as homeowners increasingly prioritize energy efficiency and indoor air quality. It's a smart, long-term investment in a home's health and future, not a passing trend.
Myth 10: Crawl Space Encapsulation is a Good DIY Project.
Fact: This is strongly discouraged. Encapsulation requires specialized technical knowledge to ensure a proper seal, understanding of equipment (like dehumidifiers and lighting in tight spaces), and experience working safely in confined areas.

Frequently Asked Questions (FAQs) on Encapsulation
Here are answers to some common questions homeowners have about crawl space encapsulation:
Q1: I've had my home for decades, why are we experiencing crawl space issues now?
A: It's a mixture of factors linked to changes in our building styles over the years. In the late 1970s to early 1980s, there was a huge shift towards making homes more energy efficient. People started using sealed windows and doors and changing natural wood floors for vinyl tiles and other materials that effectively create an "interior barrier". This constitutes a problem as, per the stack effect, moist air from underneath the home cannot properly escape upwards, creating the moisture issues we see in many crawl spaces today.
Q2: What should I expect during the encapsulation process?
A: The process generally involves cleaning and preparing the crawl space, installing a vapor barrier on the walls and floor, sealing vents and other openings, and often adding insulation and a dehumidifier.
Q3: How long does crawl space encapsulation last?
A: A professionally installed system that is properly inspected and maintained (at least twice a year) can last decades. The dehumidifier, which has a 5-year warranty, may eventually need replacement.
Q4: How much does crawl space encapsulation cost?
A: Costs vary based on the size of your crawl space, its current condition, and any additional services needed (like extensive repairs, insulation, or specific dehumidifier models). However, it's an investment that can lead to long-term savings.
Q5: What kind of maintenance does an encapsulated crawl space need?
A: Maintenance is minimal. You'll primarily need to check the dehumidifier, change its HEPA filters (recommended at least twice a year), and visually inspect the vapor barrier for damage.
Q6: Will encapsulating my crawl space make it too airtight?
A: No. A properly installed system includes measures for controlled air management, often via the dehumidifier, to ensure adequate airflow and prevent moisture buildup without reintroducing outside contaminants.
Q7: Can I use my crawl space for storage after encapsulation?
A: This is a tricky question. While encapsulation creates a clean, dry, and protected environment we discourage using the space for storage. There is a small, but not impossible, chance of wearing out the plastic liner, diminishing encapsulation's effectiveness.
Q8: How long does the encapsulation process take?
A: The on-site encapsulation work typically takes a few days, commonly 5 to 7 working days, depending on the crawl space's size and condition. The initial inspection, planning, and estimation phase can take about a week.
Q9: Will encapsulation increase the value of my home?
A: It certainly can. A dry, clean, and well-maintained encapsulated crawl space is an attractive feature to potential homebuyers, demonstrating proactive home care and improved efficiency.
Q10: My crawl space has mold. Can I encapsulate it?
A: Yes, but existing mold issues (and any other problems like leaks or structural damage) must be professionally addressed before encapsulation can proceed.
Q11: What is the best time of year for encapsulation?
A: Crawl space encapsulation can be done any time of the year. However, spring and fall often offer milder and drier weather conditions, which can be ideal.

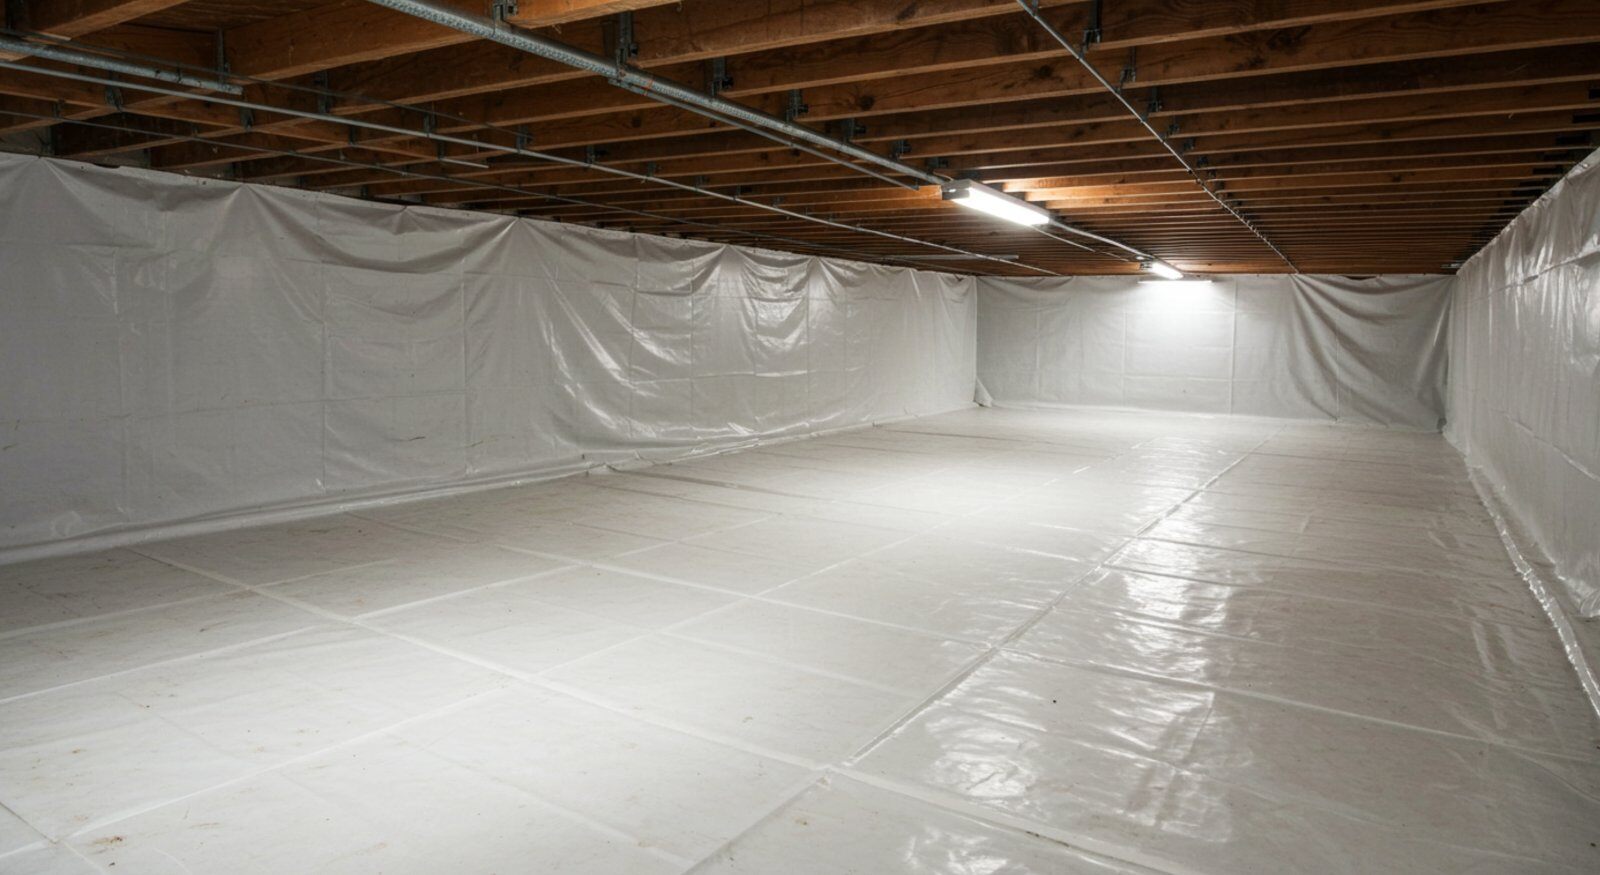
The ultimate goal of crawl space encapsulation is to transform your problem-prone crawl space into a clean, dry, and more controlled environment. It becomes more like a mini-basement—not for living in, but a space that no longer negatively impacts your home's air quality, energy use, or structural integrity. For homeowners here in El Dorado and across South Arkansas, it's a powerful way to protect their homes.

So, we have talked about crawl spaces and why encapsulation matters. Now, it's time to discuss why making this investment is good for you and your home. Let's take a look at the many benefits that encapsulation offers:
1. Improved Indoor Air Quality: As we have mentioned before, a large amount of the air you breathe inside your house actually comes up from the crawl space. If your crawl space is not handled, mold spores, dust mites, and other allergens can easily float into your living areas. Encapsulation seals off the crawl space, drastically reducing these pollutants. This means cleaner, healthier air for you and your family.
2. Energy Savings: Remember the "Stack Effect"? When air from your crawl space gets pulled up into your home, it makes your heating and cooling system work much harder, meaning higher energy bills. Encapsulation stops this air exchange. By keeping conditioned air in and unconditioned air out, your HVAC system becomes more efficient, lowering energy costs.
3. Mold Prevention: An unsealed, humid crawl space is like a perfect breeding ground for mold. Encapsulation tackles this head-on by controlling the environment's moisture levels, which mold needs to thrive. By keeping the space dry, encapsulation becomes a long-term solution to prevent musty odors and out-of-control allergies.
4. Pest Deterrence: Creepy crawlies like insects, rodents (and sometimes even snakes!) are always looking for a dark, humid, and sheltered place to move in. And there is no bigger "Welcome" sign for these uninvited guests than the vents of an open crawl space. However, encapsulation fixes that by sealing all entry points and creating a dry environment that makes it much less attractive and more challenging for these pests to get into.
5. Structural Protection: Elevated moisture levels can negatively affect your home's structure. Wooden floor joists and support beams can begin to rot and weaken over time. The same can happen to your foundation, putting your entire home at risk. With a dry crawl space, you can protect these vital areas of your home, saving you from future expensive repairs.
6. Increased Property Value: When it comes time to sell your home, an encapsulated crawl space is a big plus. It shows potential buyers that you've taken excellent care of the property and invested in its long-term health and efficiency, making your home more attractive on the market.
7. Increased Comfort: Have you ever noticed cold floors in the winter or a general damp feeling in your home during our Arkansas summers? Your crawl space could be to blame. Encapsulation regulates the temperature and humidity under your home, meaning fewer drafts, warmer floors in the winter, and a less muggy feeling indoors.
Bonus - Extra Storage Space: Once your crawl space is clean, dry, and sealed, it can become a functional storage area for some items. Think holiday decorations or things you don't need every day. It won't be a finished basement, but it's much better than a damp, dirty space.

If you feel more motivated now that you know about the benefits of crawl space encapsulation, you are in for a treat! This guide will give you a complete overview of Restore-It's crawl space encapsulation process, detailing our specific methodology, expected timelines, and how you can prepare for the project.
Restore-It's Process for Crawl Space Encapsulation
At Restore-It, our approach to this process is meticulous to ensure our technicians' safety and the job's quality. Our method addresses all contributing factors to crawl space issues, not just providing a temporary fix. Let's explore it step-by-step:
Step 1. Initial Call and Scheduling: We gather preliminary information about your crawl space, such as its approximate size, any prior work done, and any specific problems you're experiencing. Then, we schedule an inspection.
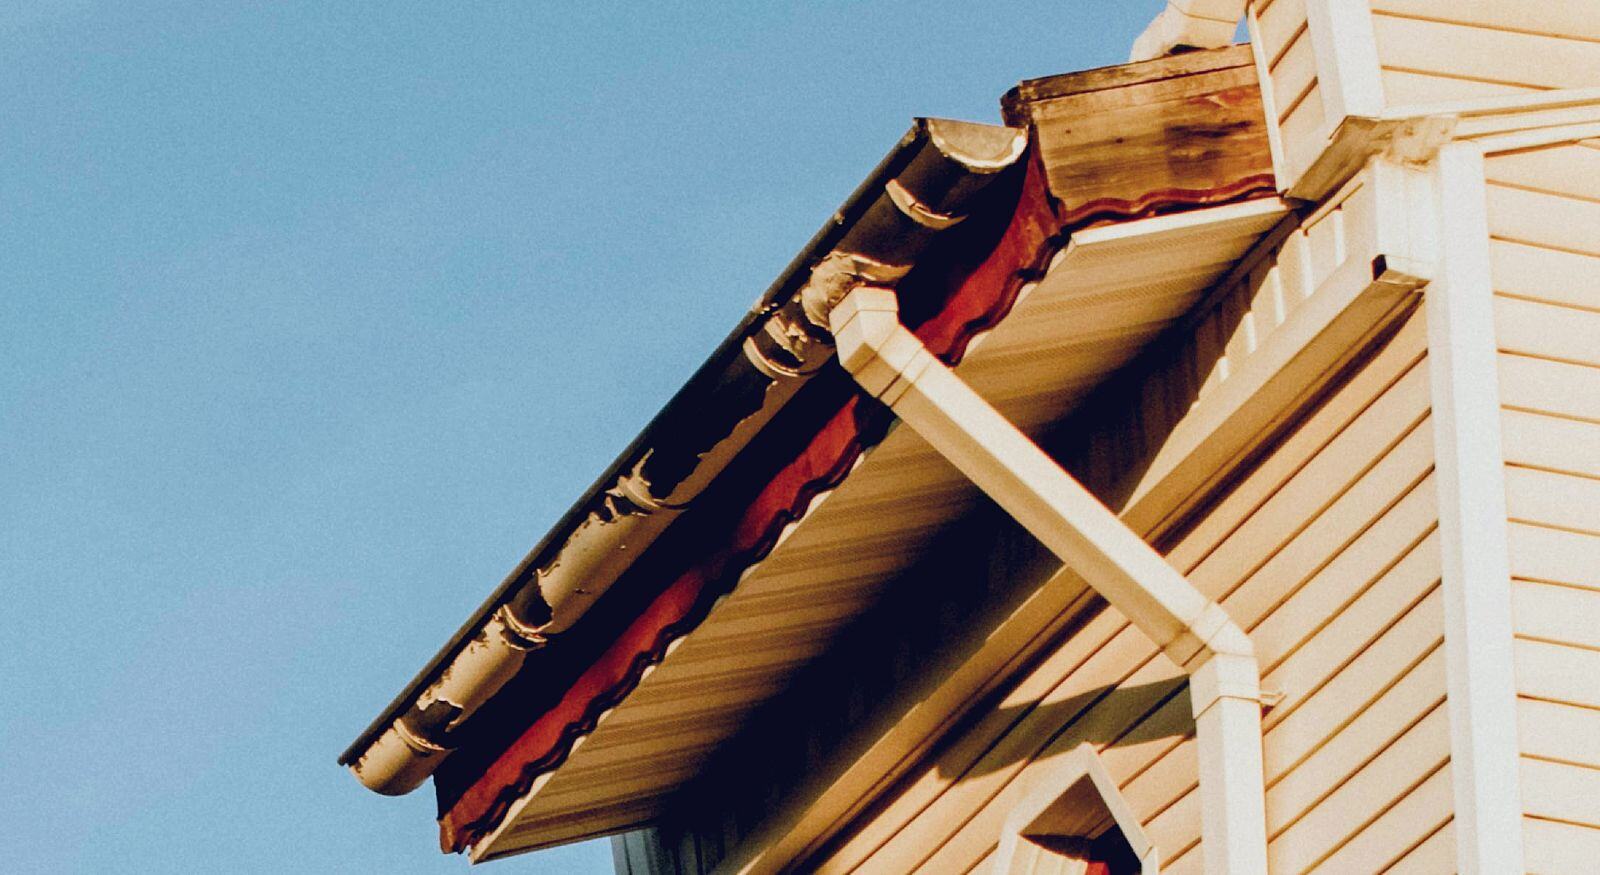
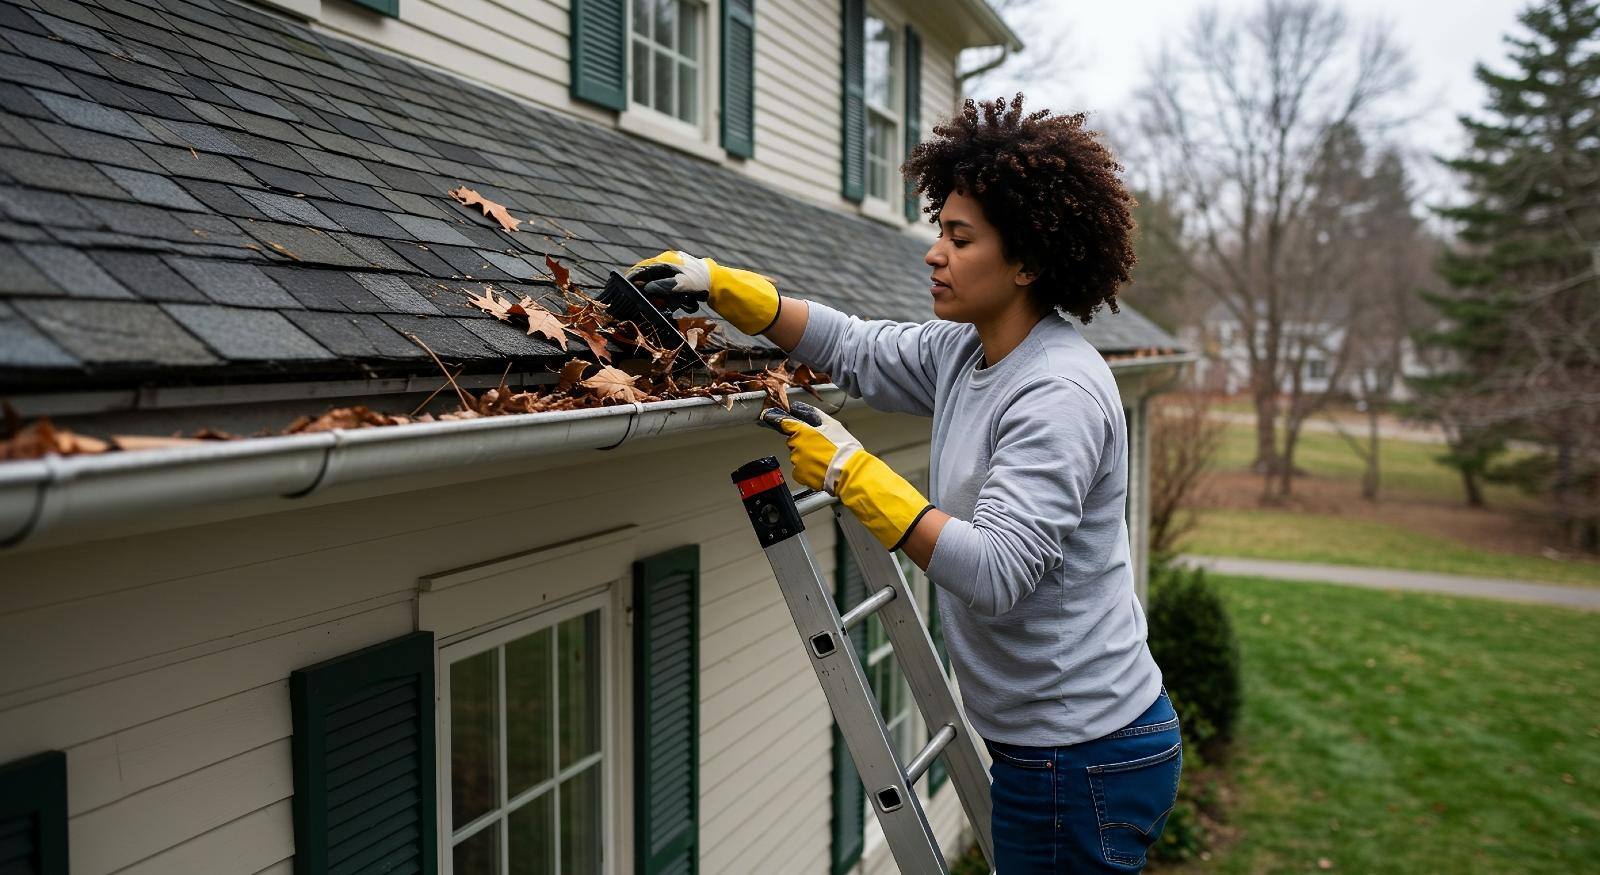
Step 2: Initial Inspection: We begin by examining the exterior of your home, looking for issues like non-functional gutters, the lay of the land, soil levels, foliage buildup, and other potential sources of air and water intrusion into the crawl space. Once the exterior inspection is complete, a technician will enter and inspect the interior of the crawl space, looking for plumbing and HVAC leaks, mold, pests, and structural concerns. We will also measure the moisture and relative humidity levels of building materials. Throughout this process, we will take measurements of the area and document any findings with pictures and videos.
Step 3. Planning, Estimation, and Authorization: Following the inspection, our technicians prepare a detailed report outlining all findings and a proposed action plan. This report includes the necessary materials, workload, and an initial estimate. We will begin working after you sign this plan with an authorization form.
Step 4. Preparation and Enhancement: Before the real work begins, we must improve the crawl space conditions. If the space is too small for movement or to fit the dehumidifier, we will excavate to create more room. Then, our team cleans the crawl space of all debris. We also remove all improperly installed vapor barriers and insulation. Finally, we install light fixtures to improve visibility for our team and for future maintenance.
Step 5. Sealing the Perimeter: Here is where the real work starts! All exterior vents and gaps in the exterior walls are sealed to prevent air intrusion. For brick exteriors, we use mortar on the outside to maintain the home's aesthetic and spray foam insulation on the inside. After that, if necessary, we will replace the entrance to the crawl space to make it airtight.
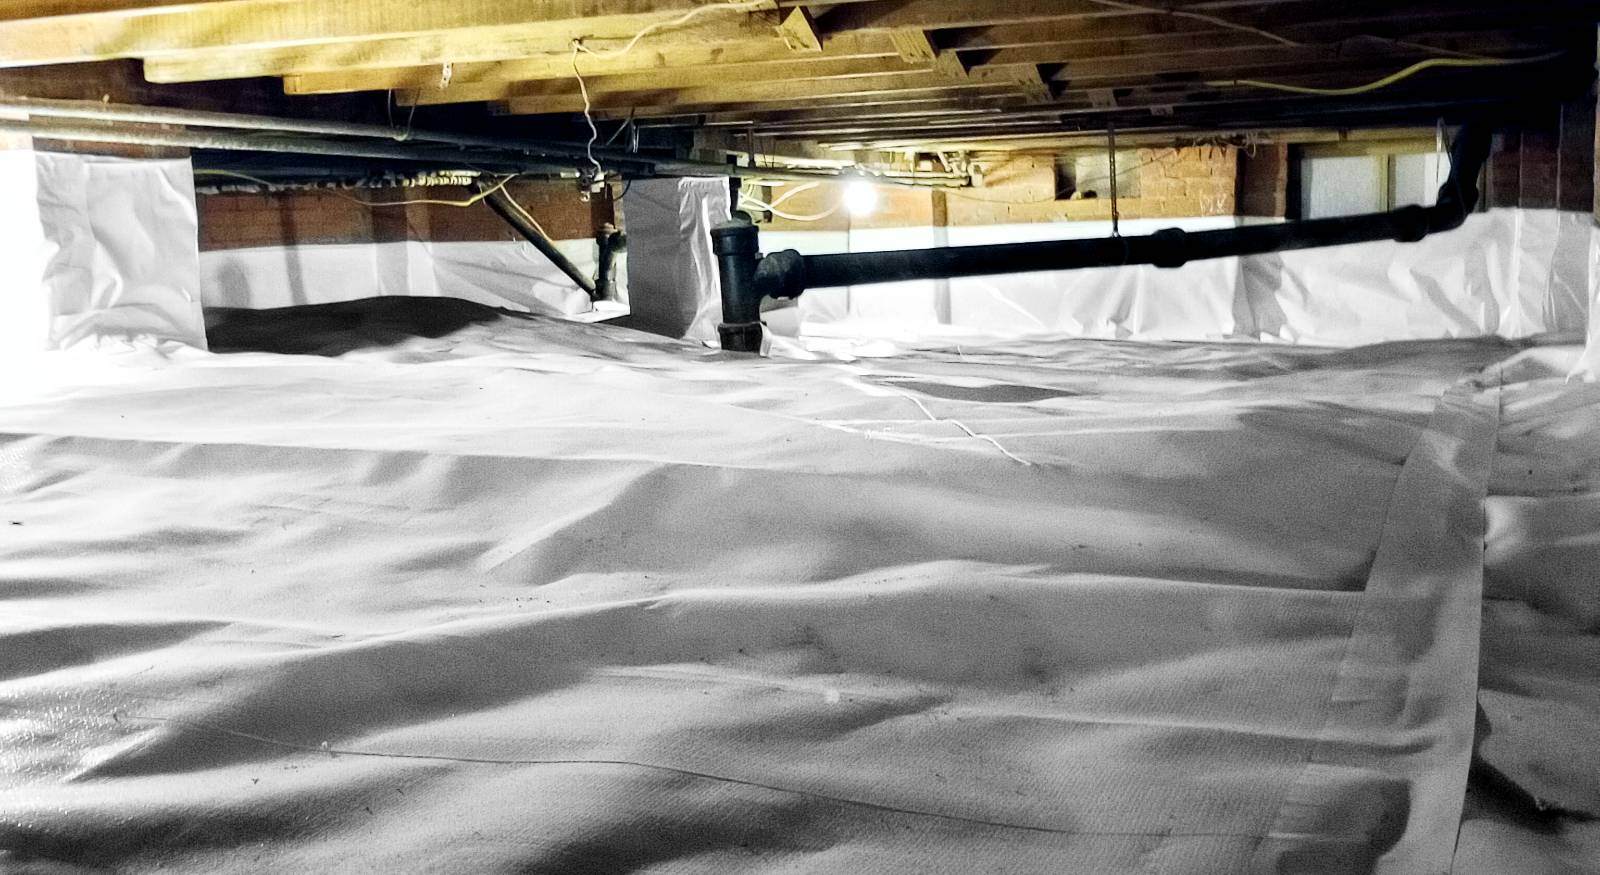
Step 6. Vapor Barrier Installation: We encapsulate the crawl space floors, walls, piers, and columns with polypropylene plastic to create a comprehensive protective system. This plastic is tied together to ensure the system's integrity.
Step 7. Dehumidifier Installation: Depending on your crawl space dimensions, we install an appropriately sized dehumidifier. This unit operates automatically to maintain optimal humidity levels. A hygrometer is also installed, allowing you to check your crawl space's conditions without entering it.
Step 8. Additional Fixtures (Optional): Sometimes, to manage water intrusion and prevent flooding, a sump pump is installed in a designated pit; this pump activates automatically when water reaches a certain level. This system is usually paired with trench or french drains around the crawl space perimeter, which connect to the sump pump. Installing these devices involves excavating before the vapor barrier is laid.
Step 9. Final Inspection and Clearing: Once the encapsulation is complete, we conduct a final inspection to ensure everything works correctly and document the area's condition. All tools and supplies are removed, and an invoice is provided.

![]()
Timeline Overview of the Encapsulation Project
The duration of a crawl space encapsulation project can vary, but here's a general timeline for a typical project with Restore-It:
- Initial Inspection (1 day): This includes exterior and interior assessment.
- Planning and Estimation (~1 week): Our technicians will write a report and create an action plan with an initial estimate.
- Crawl Space Encapsulation (3 to 10 days): The vapor barrier installation usually takes 5 to 7 days for an average-sized space. This includes cleaning, sealing vents, installing the access cover, encapsulating walls and piers, and installing the dehumidifier, hygrometer, and thermostat.
- Final Inspection and Quality Check (1 day)

![]()
Factors That Can Extend the Timeline
There are several factors that can impact the project's duration:
- Condition: This is the most important factor. Addressing issues like standing water, mold, and structural damage can add several days to the project.
- Size: Larger crawl spaces (over 2,000 square feet) require more materials and potentially larger equipment, increasing installation time.
- Height: A height below 2 feet poses safety risks and makes cleaning and encapsulating very difficult. In such cases, we must dig out the crawl space, potentially adding 1 to 2 weeks to the project.
- Poorly Done Insulation: Removing improperly installed insulation (like paperback insulation in floor joists that can trap moisture and promote mold) can take a couple of hours to a full day, even more if there is mold.
- Mold: Manually scrubbing and treating mold with a biocide can add a day or more, depending on the extent of the affected areas.
- Extra Features: Installing a sump pump and drainage system involves extra excavation and can add 3 to 4 days to the working time.
- Travel Time: Our shop is in El Dorado. Projects in distant locations within South Arkansas (e.g., Magnolia or Camden) will require more time to transport materials and technicians.
![]()
Prepare for Encapsulation with this Checklist
While our Restore-It team handles the heavy lifting, there are several things homeowners can do to help the encapsulation project proceed smoothly and efficiently:
☐ Safeguard Children and Pets: Keep your children and pets away from the crawl space access and the work area to prevent accidents.
☐ Clear the Entrance: Remove all furniture, stored items, or other large objects covering or blocking the entrance. This way, our technicians can access the area and carry equipment more easily and quickly.
☐ Remove Items Stored: Our technicians need full access to install the vapor barrier, meaning clearing any stored items from the crawl space.
☐ Pre-Inspection Checks (Optional): While our team will conduct an inspection regardless, having more information can be helpful. Let us know if you find:
- Standing water (can be from leaks or rainfall)
- Mold
- Damaged (cracks or warping) or rotten wood
- Plumbing leaks
- Damaged wiring (loose or frayed electrical wires)

☐ Ask About Extra Options: Feel free to discuss any specific concerns or ask about additional options, such as larger dehumidifiers or sump pump installation, with our technicians or sales team.

Understanding the financial aspects of crawl space encapsulation is crucial for homeowners in South Arkansas. This section breaks down the factors influencing cost, provides local insights, explains Restore-It's billing practices, and reiterates the significant return on this important home investment.
Overview of the General Cost
Getting a custom quote for your very specific situation is very important. However, there are some general pricing guidelines based on our history serving our neighbors in South Arkansas:
-
Initial Inspection: A typical inspection by two Restore-It technicians, which includes checking the exterior and interior, taking measurements, and documenting the crawl space's condition, costs around $500 (excluding taxes).
-
Encapsulation Project: Depending on the problems found in the crawl space, prices can range from $7 to $12 per square foot (taxes not included). For a 2,000 sq ft crawl space, this would amount to approximately $14,000, up to $24000 for worst-case scenarios. This price does not include the dehumidifier unit.
This price includes:
-
Installation of permanent light fixtures.
-
Setting up a dehumidifier (the unit cost is separate).
-
Hooking up the condensation pump for the dehumidifier.
-
Complete sealing with spray foam (and mortar on the outside if needed).
-
Installation of a wall-to-wall vapor barrier covering the floor and piers.
-
Ensuring the vapor barrier is tight and protective.
-
Installation of a hygrometer and thermostat with an external reader.
-
Installation of a sealed crawl space door.
It's important to remember that the costs provided are only general estimates. The final cost can change depending on several factors which we will explore next.

![]()
Factors Influencing the Cost
This type of project is not a one-size-fits-all solution. Every crawl space is different, and these conditions will affect the final bill for your project. When considering the price of encapsulation, pay attention to these key factors:
1. Size: This is the primary driver of cost. A larger crawl space will naturally require more materials and labor.
2. Condition: The existing state of the crawl space significantly impacts the price. You can expect a larger bill if our technicians need to proceed with:
- Debris and Old Insulation Removal: Cleaning out debris or removing old, ineffective, or moldy insulation will add to the initial timeline and workload.
- Mold Remediation: If mold is present, it must be dealt with before encapsulation, which is an additional process and cost.
- Pest Infestations: Pest issues need to be addressed.
- Leaks and Water Issues: All plumbing leaks or water intrusion must be resolved for the project's success.
3. Accessibility (Height and Entry): The crawl space height affects the complexity and time required. Very low crawl spaces (e.g., 2 feet or less) may need excavation for technicians to work safely and effectively, or to ensure equipment like dehumidifiers can be installed correctly (above floor level). This excavation adds to the cost. On the other hand, the ease of accessing the crawl space can also be a factor. An airtight entrance may be added to the area if needed.
4. Repairs: If moisture has caused wood rot or other structural damage, these repairs will be necessary and add to the overall project cost.
5. Materials: While standard encapsulation involves a quality vapor barrier (polypropylene plastic) and sealing materials like spray foam and mortar, the specific requirements can vary depending on the case.
6. Dehumidifier: Installing a dehumidifier as a permanent fixture of the crawl space is standard procedure in this type of project. However, the cost of the unit itself is an added expense and depends on the size of the crawl space:
- An average-sized home will use a smaller dehumidifier (around $2,000) to remove up to 70 pints of water daily.
- Larger areas need a more powerful dehumidifier (around $3,000) that can remove up to 130 pints daily.
- In very exceptional cases, depending on the way the home was built, you may need more than one dehumidifier to fully control the moisture in the entire crawl space.
7. Additional Fixtures (optional): If your crawl space experiences significant water intrusion or the risk of flooding, you might need to install extra accessories.
- Sump Pump: The pump can cost around $600, with additional installation costs, including excavating a "sump pit."
- French Drains: This drainage system, dug into the ground, guides water flow towards a sump pump. The cost depends on the linear footage of the perimeter of your crawl space.
8. Labor Costs: Labor is a significant component of the final bill. Working in tight, challenging crawl space conditions can increase the time needed. For safety, at least two technicians are typically present; up to four may be required for larger jobs.
9. Distance: We are located in El Dorado but serve the South Arkansas area. The closer you are to our main shop, the faster our technicians can reach your crawl space. Added traveling time will be reflected in labor cost, which is measured by the time our technicians work on the project. This won't affect your final bill if your home is within city limits.
![]()
The Billing Process at Restore-It
Professional crawl space encapsulation is a home improvement project that insurance companies generally do not cover. A transparent conversation about the billing process will prepare you so that there are no surprises during the project.
1. First Inspection and Estimate: After the initial inspection (which has a fee), our technicians provide a detailed report and an initial estimate outlining the scope of work, materials, equipment, and general cost. However, the final bill can change if unforeseen issues are encountered later. This first inspection comes free of charge.
2. Contract Signing: Once you agree to the estimate, you will sign a contract detailing the work, timeline, cost, and payment terms. We are happy to review this with you and answer any questions.
3. Addressing Issues: If any unforeseen problems (like a hidden leak) are discovered that require extra work or equipment (like a sump pump), we will stop work and inform you about the situation and any potential cost adjustments. We recommend extra work only when it is strictly necessary for the project's success.
4. Final Invoice and Payment: We will send you an invoice upon completion of the job, and payment should be submitted at that time.
5. Warranties: We stand by our work with the following warranties:
- 20 years for encapsulation materials (polypropylene plastic vapor barrier).
- 5 years for the dehumidifier.
- 1 year for workmanship.

![]()
Return on Investment
Now, while we have talked previously about the general benefits of crawl space encapsulation, we have focused more on the health and comfort, and not so much on the economic side of it. The reality is that encapsulation is not an expense, but a smart investment that pays you back in many ways:
1. Energy Savings: One of the most significant returns is improved energy efficiency. By sealing and insulating your crawl space, you can save an average of 15% on heating and cooling costs or about 11% of your total energy bill. A less strained HVAC system will lower your utility bills month after month.
2. Avoiding Water Damage: This project prevents water intrusion, which can lead to expensive repairs and save you money in the long term.
3. Improved Indoor Air Quality & Health Savings: A sealed crawl space prevents dust, allergens, and mold spores from entering your living areas, reducing respiratory problems and associated healthcare costs.
4. Pest Prevention: Sealing entry points makes your crawl space less inviting to pests like rodents and insects, avoiding damage and the need for pest control.
5. Increased Home Value: An encapsulated crawl space is a big selling point, indicating a well-maintained and protected home. It can attract buyers and increase your asking price, as potential buyers are wary of uncared homes.

6. Reduced Maintenance Costs: A clean, dry, encapsulated crawl space requires less ongoing maintenance and fewer repairs than an unsealed one.

Selecting the right company for your encapsulation project is just as important as deciding to do it in the first place. This is an important investment for your home's health and longevity, so you will want to work with a reliable partner. Here, we will show you how to find a trustworthy company.
Follow this Checklist to Find Your Encapsulation Partner
☐ Assess Their Experience:
- Does the company have a proven track record with years of experience specifically in crawl space encapsulation?
- Have they completed numerous projects similar to yours? (A lack of experience can lead to subpar work and future costs.)
☐ Verify Reputation and Reviews:
- Have you checked online reviews on Google, Yelp, or Angie's List?
- Do they have positive feedback, or are there red flags like complaints?
- Can the company provide references from past customers?
☐ Confirm Insurance and Certifications:
- Is the company fully insured? (Ask for proof to protect yourself from liability).
- Do they hold relevant certifications, such as from the IICRC, especially if mold or water damage is present? (Arkansas may not have a specific encapsulation license, so industry certifications are key.)
☐ Inquire About Quality of Materials:
- What specific type and thickness of vapor barrier do they use? (Look for durable materials, e.g., polyethylene plastic of at least 20-mil thickness).
- What sealing materials and dehumidifiers do they recommend, and why? (Using quality materials is crucial for long-term success.)
☐ Understand Warranties and Guarantees:
- Does the company offer warranties on workmanship and materials?
- What is the warranty length, what does it cover, and what is the process for making a claim? (A good warranty offers peace of mind.)

☐ Review for Clear and Detailed Proposals:
- Have you received a comprehensive written proposal?
- Does it include:
- A thorough inspection report of your crawl space?
- A clear explanation of the proposed encapsulation process?
- A detailed list of all materials to be used?
- A complete breakdown of costs?
- A projected timeline for the project?
- Complete warranty information in writing?
- Have all your questions and concerns been addressed clearly and to your satisfaction before signing?
What Restore-It Brings to the Table
The market has many options, but not every option is equal in value. Find out if we are the best option for your needs by considering what we offer:
- Experience and Expertise: Restore-It brings over a decade of experience to every project. We are an IICRC-certified firm and have seen a wide array of crawl space issues, meaning we're equipped to handle every need professionally and effectively.
- True Encapsulation: We offer a complete system to control moisture beyond a preventative or temporary fix. Other companies offer partial solutions that don't address the root cause of the issues. Some make mistakes, such as using fiberglass insulation in the floor joists, which leads to mold growth.

- Quality Materials and Workmanship: We use only high-quality materials, including vapor barrier liners (at least 20 mm thick), spray foam, and reliable dehumidifiers. Our attention to detail ensures lasting protection.
- Strong Warranties: We stand firmly behind our work. Restore-It offers a 20-year warranty on encapsulation materials, a 5-year warranty for the dehumidifier, and a 1-year warranty for workmanship. If issues arise due to our fault, we will cover the expenses.
- Focus on Transparency: We see ourselves first as industry educators. We want you to understand the process, the challenges in the market, and the reasons behind our methods. We provide clear, detailed proposals and are always available to answer your questions.

- Company Values: Our operations are guided by integrity, dependability, humility, and grit. We strive to maintain high ethical standards, be there for your needs, listen to your concerns, and persevere through the toughest jobs.
- Proven Track Record: With hundreds of satisfied customers in South Arkansas, our reputation speaks for itself.

Throughout this guide, we've explored your crawl space's impact on your home's overall well-being and the transformative benefits of encapsulation. By choosing to encapsulate, you're not just undertaking a home improvement project; you're making a proactive decision to improve your living environment and protect your most valuable asset. The advantages are clear and far-reaching:
- Breathe Healthier, Cleaner Air: Encapsulation is a formidable barrier against moisture, mold, mildew, pests, and the allergens they bring. This directly translates to improved indoor air quality, allowing your family to breathe easier and enjoy a healthier home.
- Lower Energy Bills: A properly sealed and insulated crawl space means your heating and cooling systems don't have to work overtime to maintain comfortable temperatures. This increased efficiency leads to tangible savings on your monthly energy bills.
- Protect Your Home's Structure: Encapsulation safeguards your home's foundation, wooden joists, and subflooring from rot, decay, and infestation by controlling moisture and preventing pest access, ensuring its structural integrity for years to come.
For homeowners in El Dorado, Camden, and across South Arkansas, Restore-It stands as your dedicated partner in achieving these benefits. With over a decade of experience, IICRC certification, and an unwavering commitment to quality materials and superior workmanship, we pride ourselves on delivering lasting solutions.
Our core values guide every project we undertake, ensuring you receive not only a technically sound encapsulation system but also a customer experience built on trust and transparency. We understand our local climate's unique challenges and tailor our approach to provide effective protection for your home.

Don't let an unhealthy crawl space compromise your home and your family's comfort any longer. Take the first step towards a healthier, more energy-efficient, and structurally sound home today. Contact Restore-It now to schedule your initial inspection and receive a personalized quote. Our expert team is ready to assess your crawl space, answer all your questions, and design a custom encapsulation solution for your South Arkansas home.
Call us at 870-918-0041 or visit our website to schedule a call. Let Restore-It help you take control of your home's health!
Topics:


